
Open-sourcing the setup of this website through notes (below) I wrote for a session taught.
Why Jekyll
Jekyll is a Ruby based static website builder. Framework for static websites (very loosely think of it as p5 to Javascript - although p5 is a library).
Gets you familiar with:
- Linux and command line
- Ruby (gems, package managers, annoying parts)
- Apache (or Nginx)
- Git (github, bitbucket etc)
- Nano (terminal text editor)
- XML/HTML/ CSS
-
how programmers work/get frustrated… street cred
- Exposes you to open source tech
- Liberates you from Cyber Duck
There are ALOT of benefits of having own server:
- Build more websites without paying more
- Experiment with new tech (I built my own VPN)
- Storage space in the cloud (nobody uses it for that, but it’s possible)
Free Hipster themes and a great community
Digital Ocean (DO)
- DigitalOcean.com
- Sign up / Login
- cloud.digitalocean.com/droplets
- Create Droplet
- Ubuntu 14.04.3 x64
- $5/month (20 GB SSD)
- Datacenter: your call, gives you an IP address
- Additional options (backup is paid, can configure later)
- no SSH keys (unless you have one, or know what it is)
- root password emailed
- Give it a name
- Wait
- More (dropdown), adding domains, access console
DO - Console
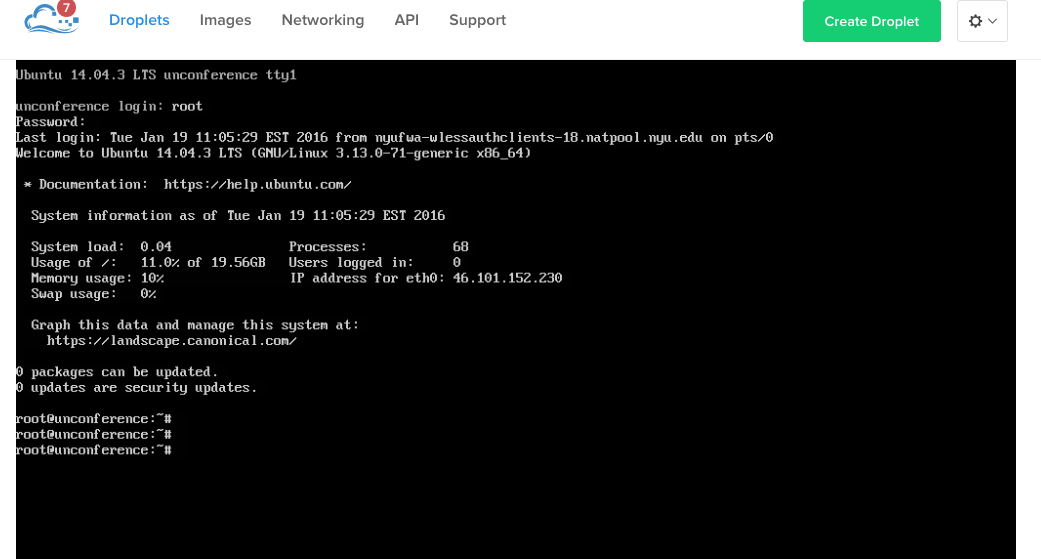
- console access
- username: root
- password: (emailed)
-
Might have to login & reset VPS password if you didn’t receive it (DO bug)
- On your terminal
ssh root@123.456.789.0- set-new password (alpha numeric) if it’s first time logging in
- root@yourname$
- Type ‘exit’ to close/logout

Alternatives to DO
We’re using DO for its UI and cost effectiveness primarily.
Linode
Linode was the preferred hosting provider by Developers (think early-mid 2000’s). DO offered a much cleaner (simpler) and cheaper (4 times) experience however, getting a lot of traction with newbies. There are a ton of benefits to Linode, but not if you’re a newbie.
Amazon AWS (EC2)
Let’s not go there, but they’re a full scale IaaS provider. They offer alot more than you need.
-
DreamHost is another option. Your call, but this tutorial covers DO specifically.
-
GitHub Pages is not really an alternative to DigitalOcean but I’m listing it here as an alternative to setting up your website on Jekyll. If you use GH Pages, you’ll save a lot of hassle, because they take care of the infrastructure (server setup, git & ruby installation, virtual hosts (apache)) leaving you to focus on working on your website only. My aim is to teach you how to setup your own server because of its benefits.
IMP
We’re now installing software on our computers using command line
Assumptions:
- You’re the owner (root access) of the machine…if you change something (like install a newer version of Ruby - which could break your other apps), only you get effected
- You will Google for errors. Stackoverflow is your friend…and so are the residents
- When explaining terms like RVM, BREW or APT-GET, I will keep things simple so please don’t hold me to them and I could be wrong
- You can come across unexpected errors which I didn’t when covering this tutorial. Look for help if that’s the case, chances are somebody came across it too - Google is your best bet.
LOCAL - ruby, rvm, jekyll
You need to have root access and open terminal (command+spacebar on mac, type: terminal). Then: “pwd” (enter).
Move to /Users/yourname.
mkdir unconference
cd unconference
\curl -L https://get.rvm.io | bash -s stable --ruby- curl -L https://get.rvm.io (curl is the equivalent of a URL but in linux)
- rvm is like a software that manages Ruby (and its libraries) to make sure you get the latest or stable version
-
pipe (it’s called taco-bell programming) - bash -s stable —ruby=2.3.0
Once that’s done (it will take several minutes), log out and log back in.
gem install jekyll
// gem install bundler
// bundle install
// updates gems for jekyll (gems are libraries, think p5 lib’s)
LOCAL: Homebrew & Git
Homebrew is to Unix (Mac) what RVM is to Ruby or bundle is to gems It will help you install github on your mac without dealing with conflicts
ruby -e "$(curl -fsSL https://raw.githubusercontent.com/Homebrew/install/master/install)"
brew update
brew install git
LOCAL: build the blog
pwd // (make sure ur in folder unconference/ (pwd -> print working directory))
jekyll new awesomeblog
ls
cd awesomeblog
ls
jekyll s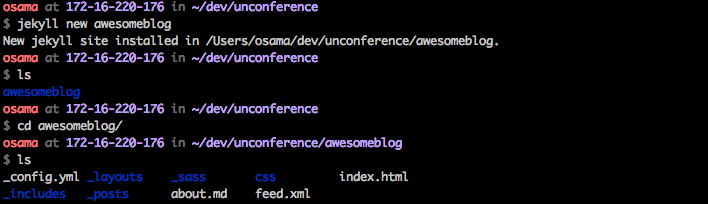
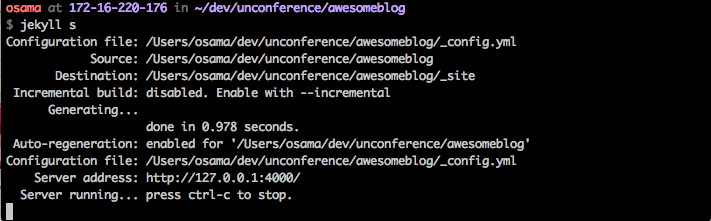
Browser: localhost:4000/ Edit this page using sublime

ctrl + c
git init (initialize)
git add .
git commit -m "Initial commit”
Recap
-
You bought and setup a server (VPS - linux) on Digital Ocean
-
On your local machine you setup:
- rvm
- ruby
- jekyll
- homebrew
- git
- a new jekyll blog (awesomeblog)
- Setup Git to manage the blog code
Next: do the above on VPS (Digital Ocean) and connect with each other
VPS : Apache
Right now you have a HDD in space with Linux installed in it, and you can login to it. That’s it. Now we’re installing software that processes HTTP requests. That’s Nginx or Apache (50% of internet pages are served through them).
One of them is good for extremely large traffic, the other isn’t.
sudo apt-get update
sudo apt-get install apache2VPS: Git
apt-get update
//apt-get is like the brew of linux
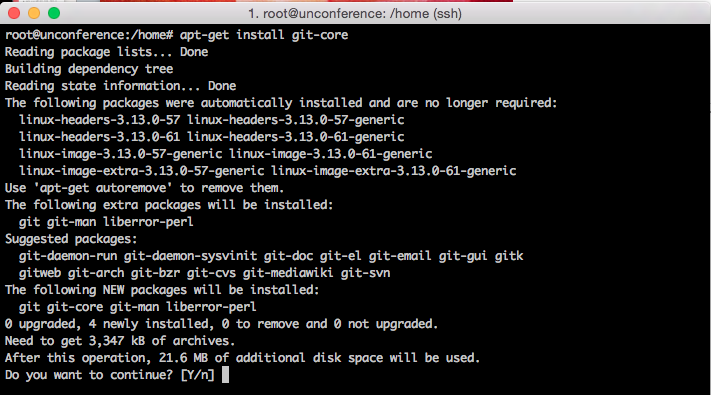
apt-get install git-core
Y 
VPS: Ruby, Jekyll, Git
\curl -L https://get.rvm.io | bash -s stable --rubyIf: gpg —keyserver error: gpg –keyserver hkp://keys.gnupg.net –recv-keys 409B6B1796C275462A1703113804BB82D39DC0E3 \curl -L https://get.rvm.io | bash -s stable –ruby
source /usr/local/rvm/scripts/rvm
gem install jekyll
jekyll -v
pwd
cd /home
ls

VPS: bare git repo
cd ~/
mkdir repos && cd repos
mkdir awesomeblog.git && cd awesomeblog.git
git init —bare
cd hooks
touch post-receive
nano post-receive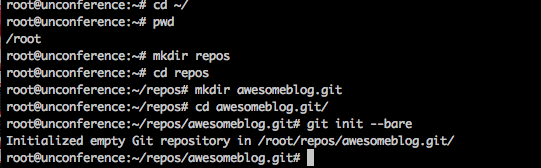
Paste:
#!/bin/bash -l
GIT_REPO=$HOME/repos/awesomeblog.git
TMP_GIT_CLONE=$HOME/tmp/git/awesomeblog
PUBLIC_WWW=/var/www/awesomeblog

git clone $GIT_REPO $TMP_GIT_CLONE
jekyll build --source $TMP_GIT_CLONE --destination $PUBLIC_WWW
rm -Rf $TMP_GIT_CLONE
exit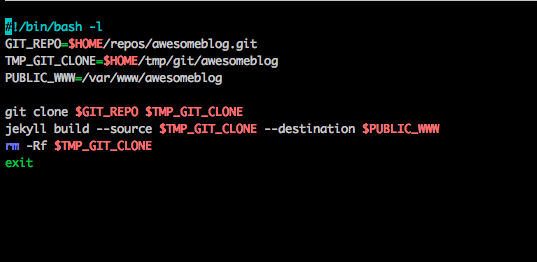
Control + o (write, save) and control + X (exit)
chmod +x post-receivePress enter, chmod makes it an executable file not a simple text file anymore.

LOCAL: Connecting Local with VPS
Ctrl + c Exiting server and now on local, make sure you’re in the right directory.
git remote add DROPLET_NAME root@123.456.789.0:repos/awesomeblog.git
git add .
git commit -m “first commit”
git push droplet master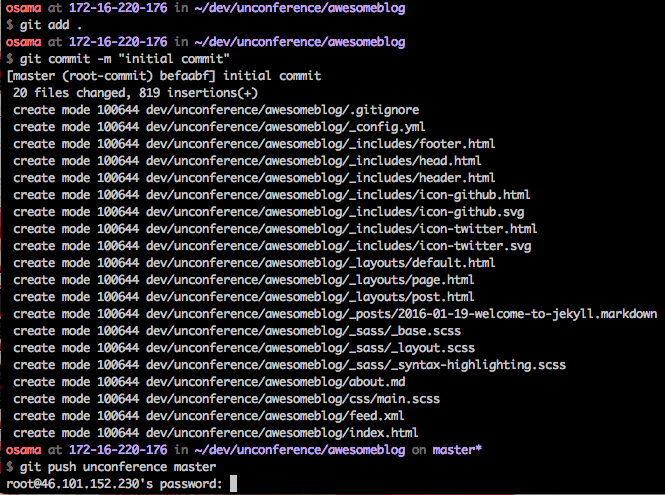
TIME DEPENDENT :: VPS CONFIG APACHE (get your own domain pointing to your blog)
On VPS:
sudo mkdir -p /var/www/awesomeblog/
sudo chown -R $USER:$USER /var/www/awesomeblog/
sudo chmod -R 755 /var/www
sudo cp /etc/apache2/sites-available/000-default.conf /etc/apache2/sites-available/awesomeblog.conf
sudo nano /etc/apache2/sites-available/awesomeblog.conf
Change values, and add two directives ( ServerName osamasehgol.com & ServerAlias www.osamasehgol.com)
<VirtualHost *:80>
    ServerAdmin osama@timesvr.com
    ServerName 1234.5678.9.0
    ServerAlias www.example.com
    DocumentRoot /var/www/awesomeblog
    ErrorLog ${APACHE_LOG_DIR}/error.log
    CustomLog ${APACHE_LOG_DIR}/access.log combined
</VirtualHost>
control + O
control + XEnable virtual host file:
sudo a2ensite awesomeblog.confReceive message: enabling site awesomeblog
service apache2 reload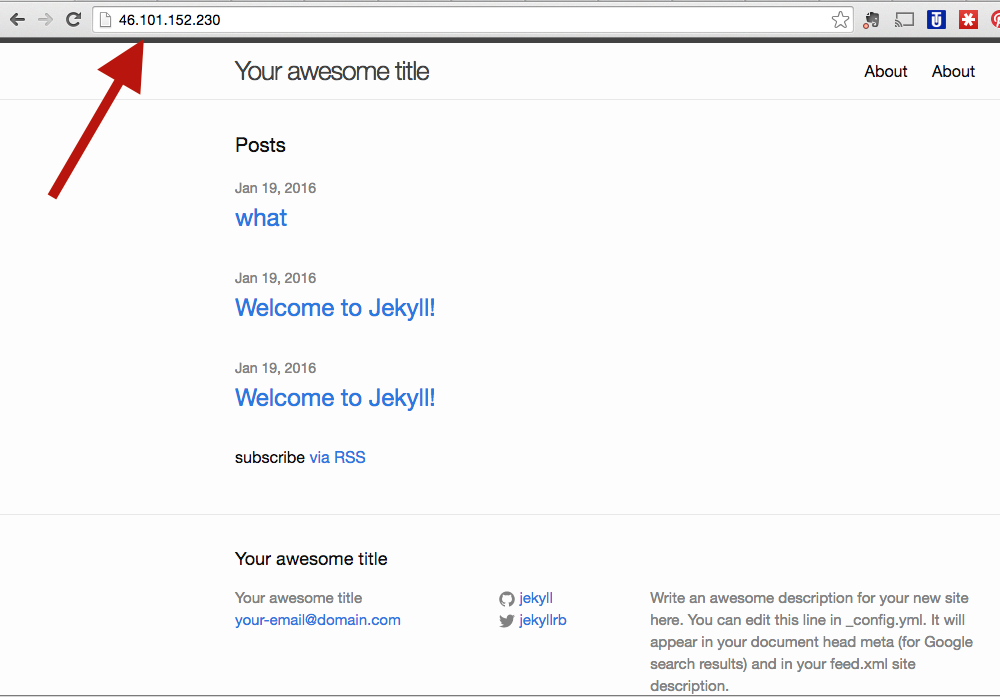
You’re Done! >:-D
Further Resources:
- Actual Tutorial
- GoHugo
- Changing Domain Name
- GitHub pages (like Wordpress)
- Rbenv or RVM
- Ruby - David H